This tutorial provides the steps to add Tyepkit now Adobe Fonts in Genesis. It will also work with any WordPress theme.
Adobe offers some free fonts and You can buy premium by subscribing to any Adobe CC product. You can find some of them here on Adobe Edge.
STEP 1
The first step is to select and Create Your project name containing the font family styles. Open Adobe Fonts and click on the code icon below the font family and select the styles and weight.
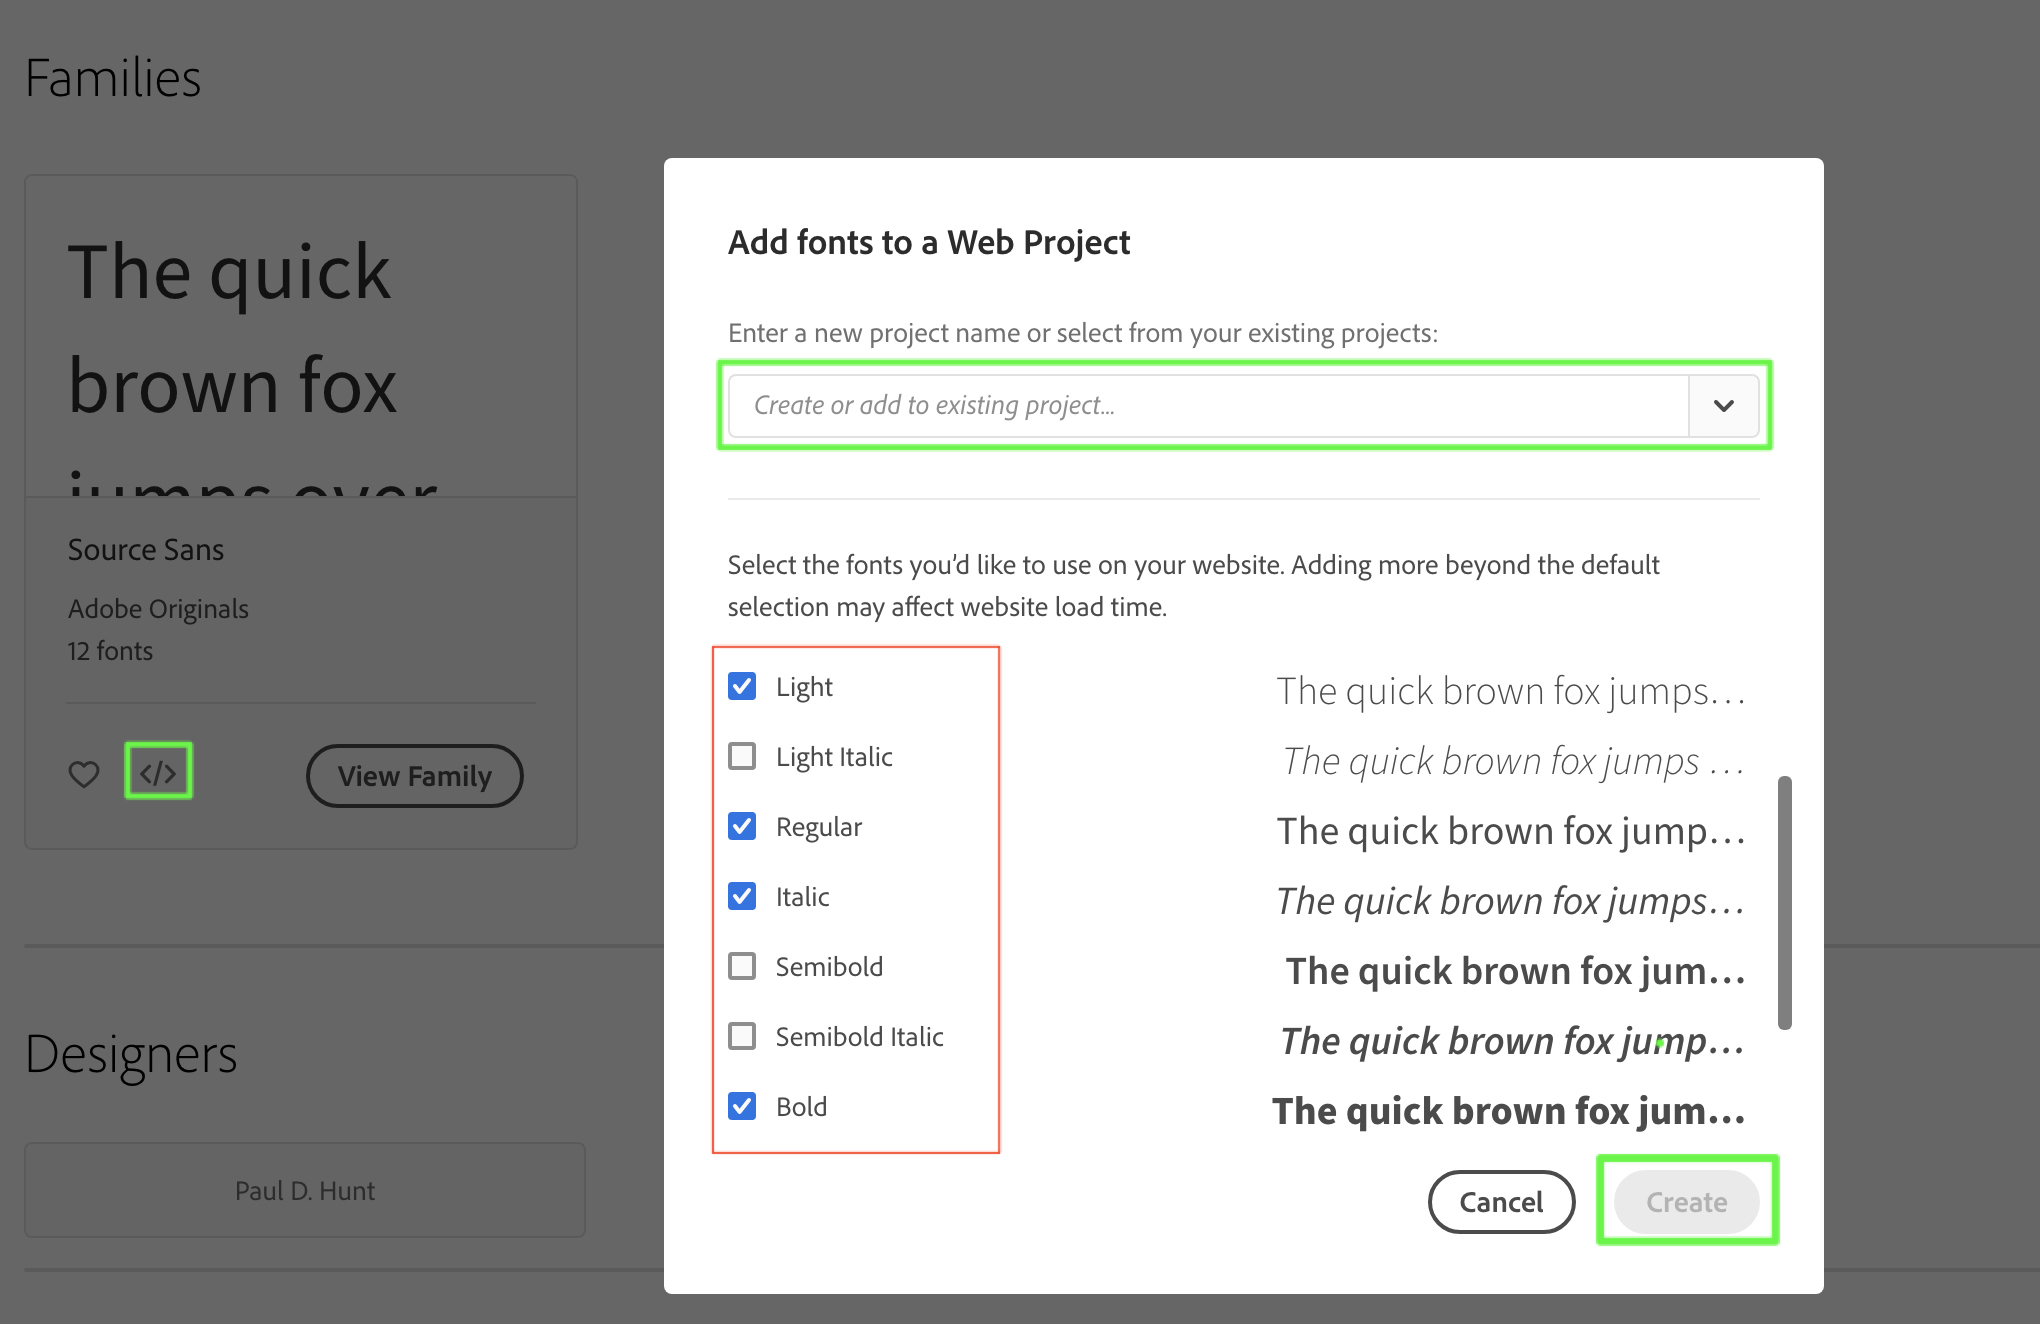
Assign/Create a Project Name. Save. and You will Find the Code and Font-family name for CSS.

You can also make more Changes by clicking on Edit Project. You can find all Your Adobe Fonts Project here.
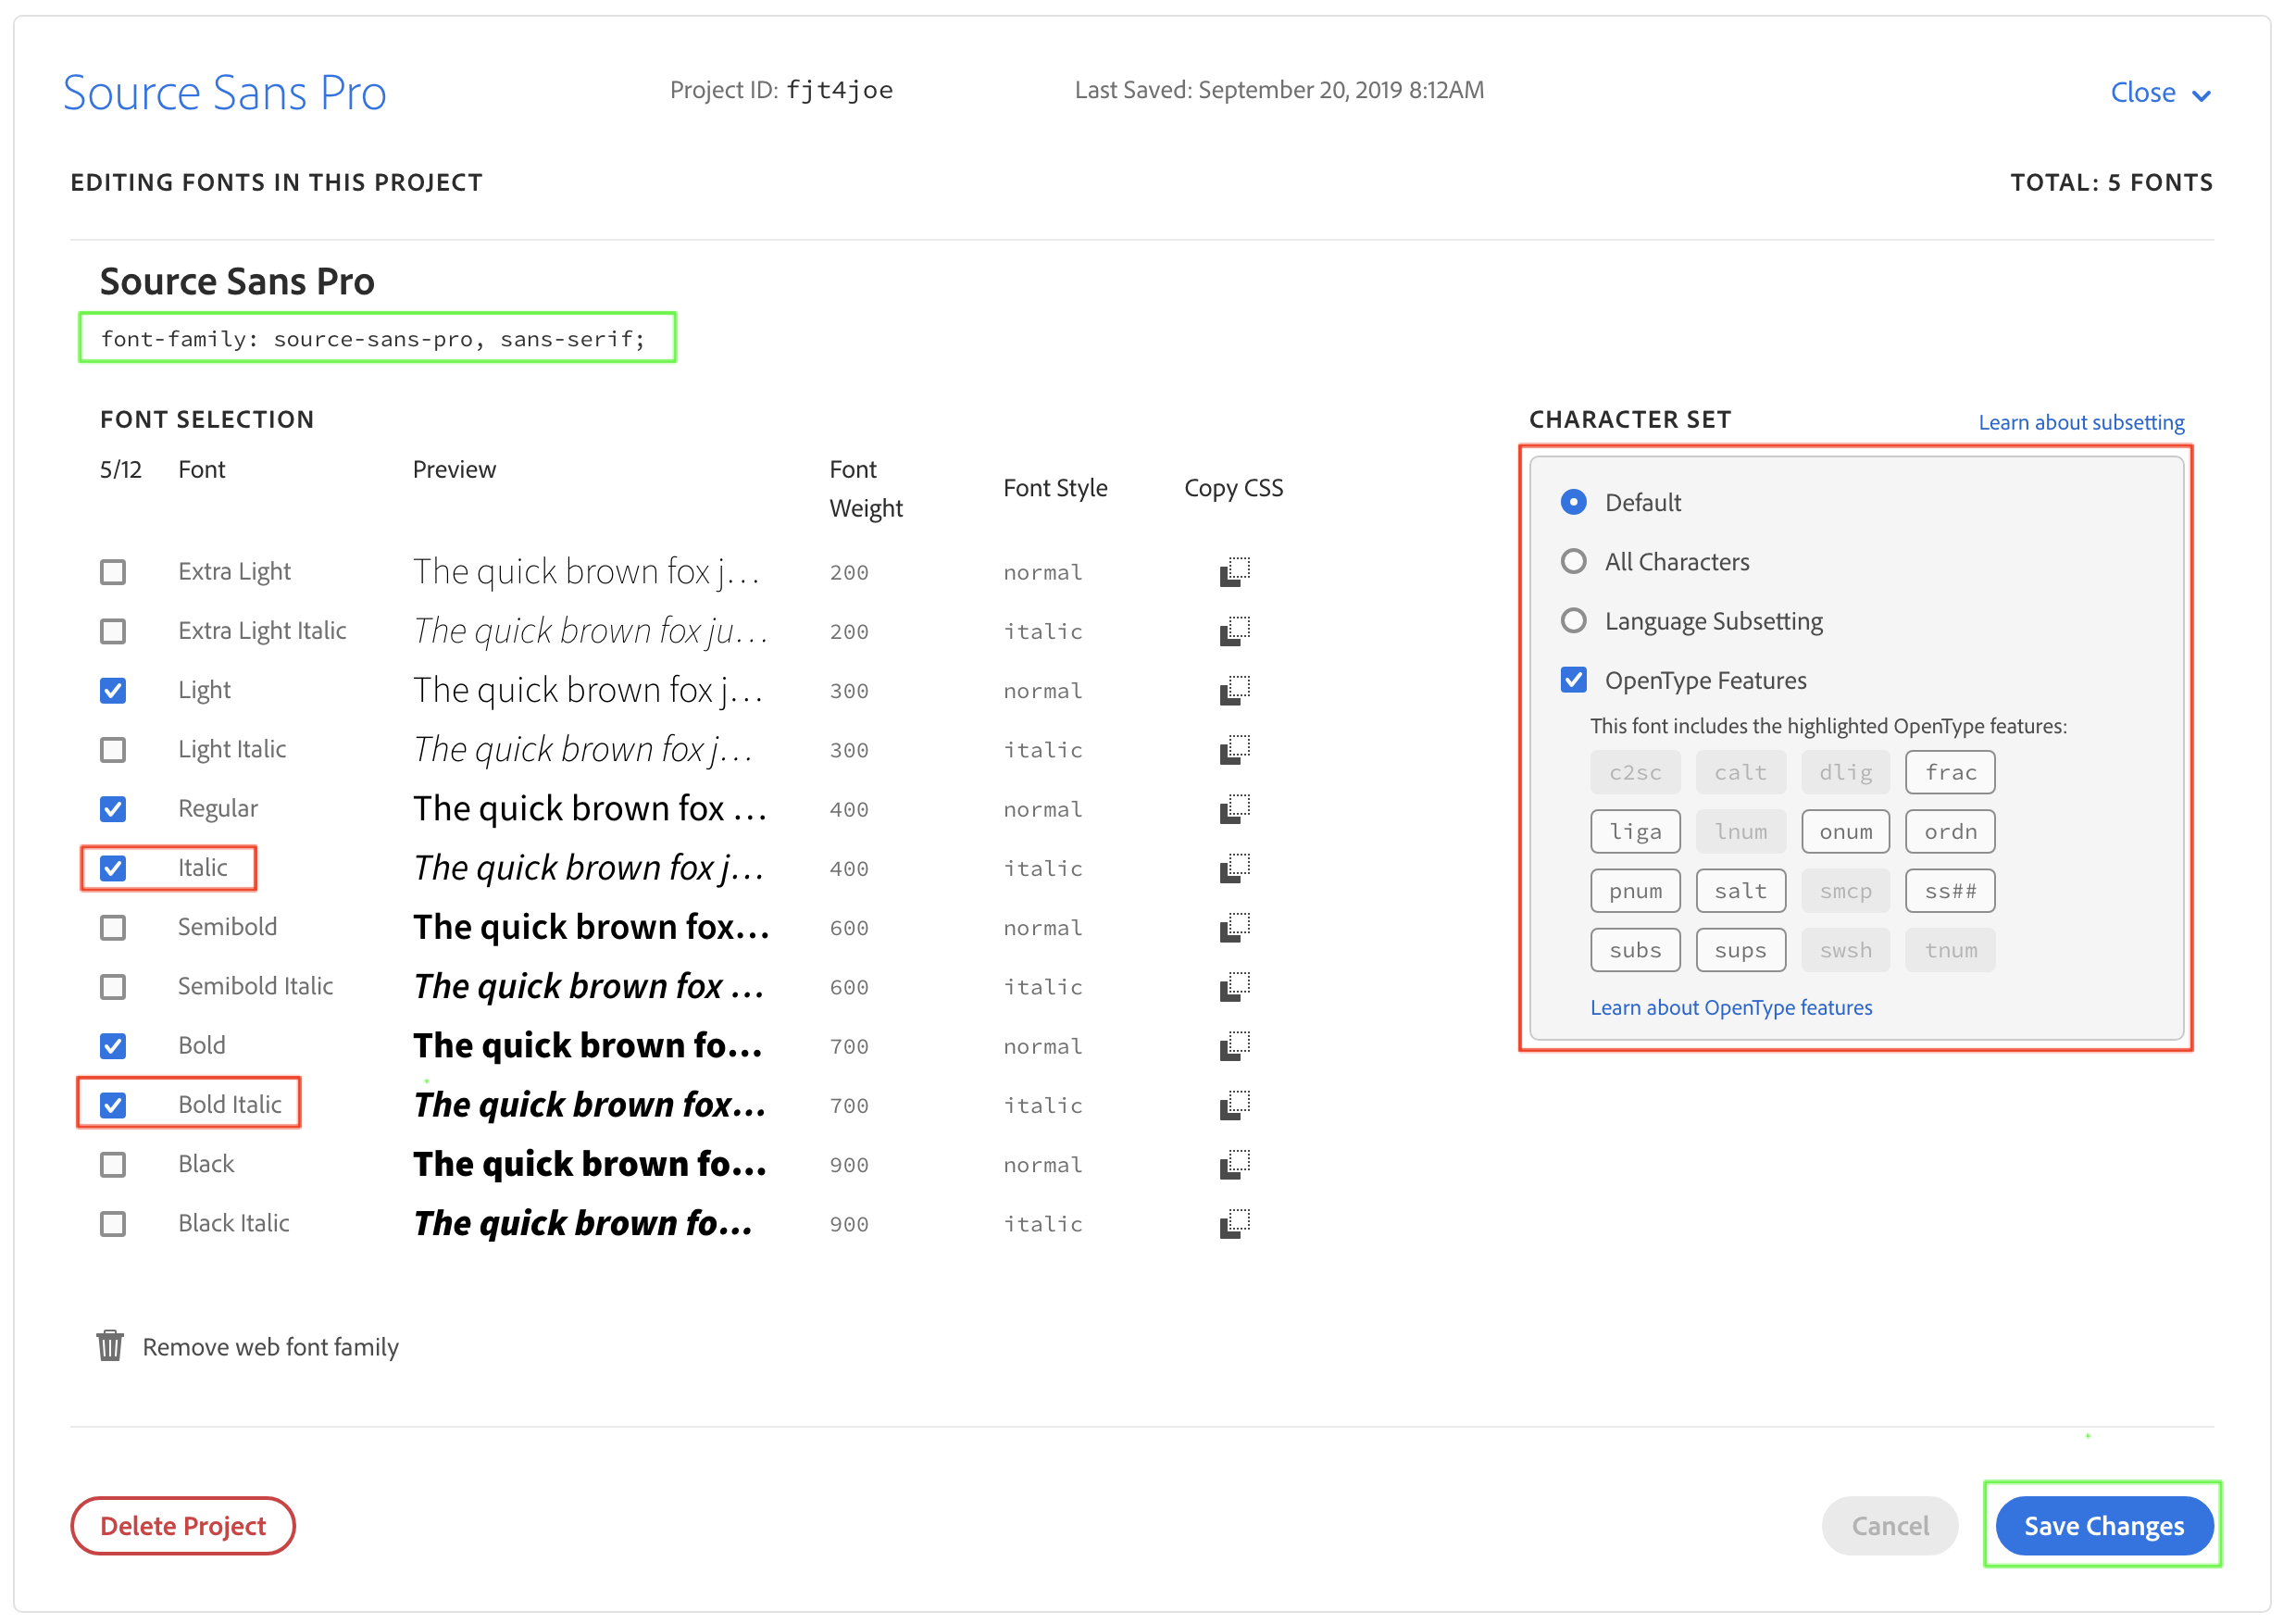
Read the font-family: NAME; we will use in CSS.
STEP 2
It is the time to enqueue the stylesheet given by Adobe Fonts. You can find it on My Adobe Fonts Page.
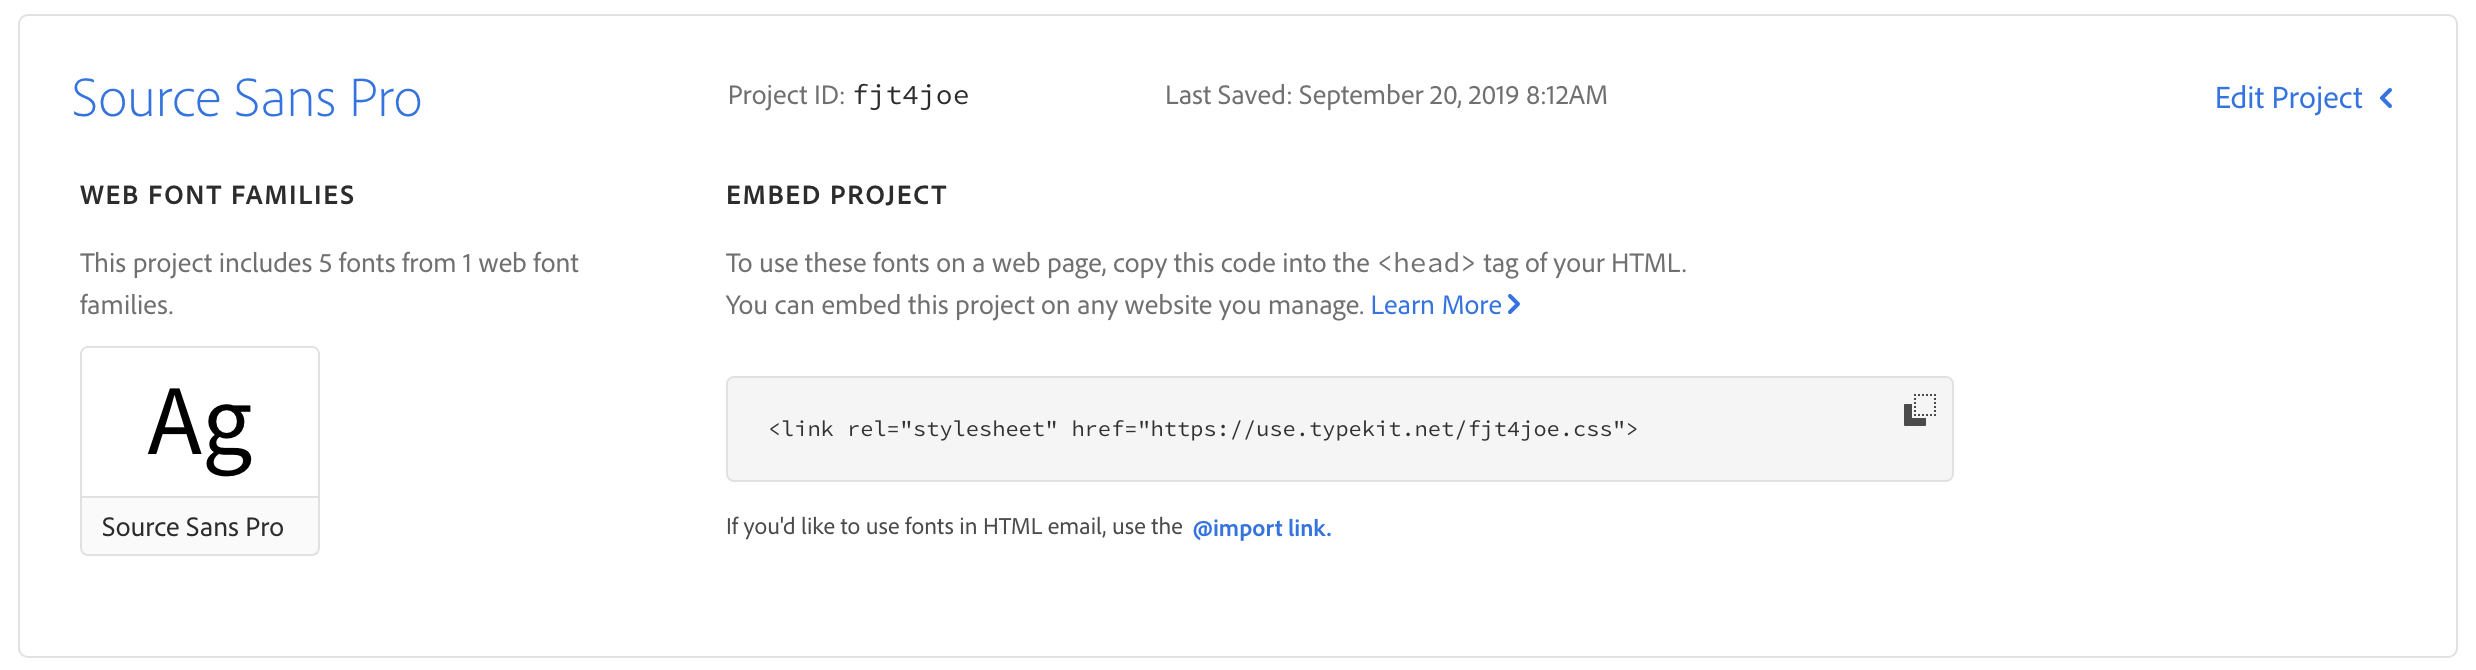
There are different ways to add this code. Here are some of them are. Use Only one.
TYPE 1
You can add this in Header Script section of Theme Settings. You can also use a Plugin to insert code in Header.
<link rel="stylesheet" href="https://use.typekit.net/fjt4joe.css">
TYPE 2
You can use @import method in stylesheet (.css) file to load the adobe fonts. Click on @import link to get the code. This code is adding <styles> so you can also use it in Header script section or simply add only line in style.css of your child-theme.
@import url("https://use.typekit.net/fjt4joe.css");
TYPE 3
You can enqueue it in your child-theme/functions.php
//* Add Typography stylesheet.
add_action( 'wp_enqueue_scripts', 'enqueue_custom_typography', 1 );
function enqueue_custom_typography() {

  //* Typekit style
  wp_enqueue_style( 'typekit', 'https://use.typekit.net/fjt4joe.css', array(), '1.0.0', 'all' );
}
You can change the Priority 1 to have more control.
Usage:
Add the following line in body css or the specific class where you want to use this font family.
font-family: source-sans-pro, sans-serif;
like
body {
font-family: source-sans-pro, sans-serif;
}
for Heading we follow similar but will give font-weight mentioned in the CSS.
Change the typekit.net url with your own and font-family with your font. To learn more about hosting fonts. Read Hosting fonts locally in WordPress.
Thanks for this post – I was searching for how to enqueue the kit.