We have installed Genesis framework and a child theme in earlier post and today we are going to setup it perfectly.
Setuping Genesis framework and child theme is simple and doesn’t require any technical knowledge. It is a 2min work but covers the most important settings needed for a perfect site.
So, without wasting a sec, let’s see how to set up Genesis Framework and child theme perfectly.
To-do List 1.
 Step 1. Create Two Pages Example, I name it 1. Home and 2. Blog
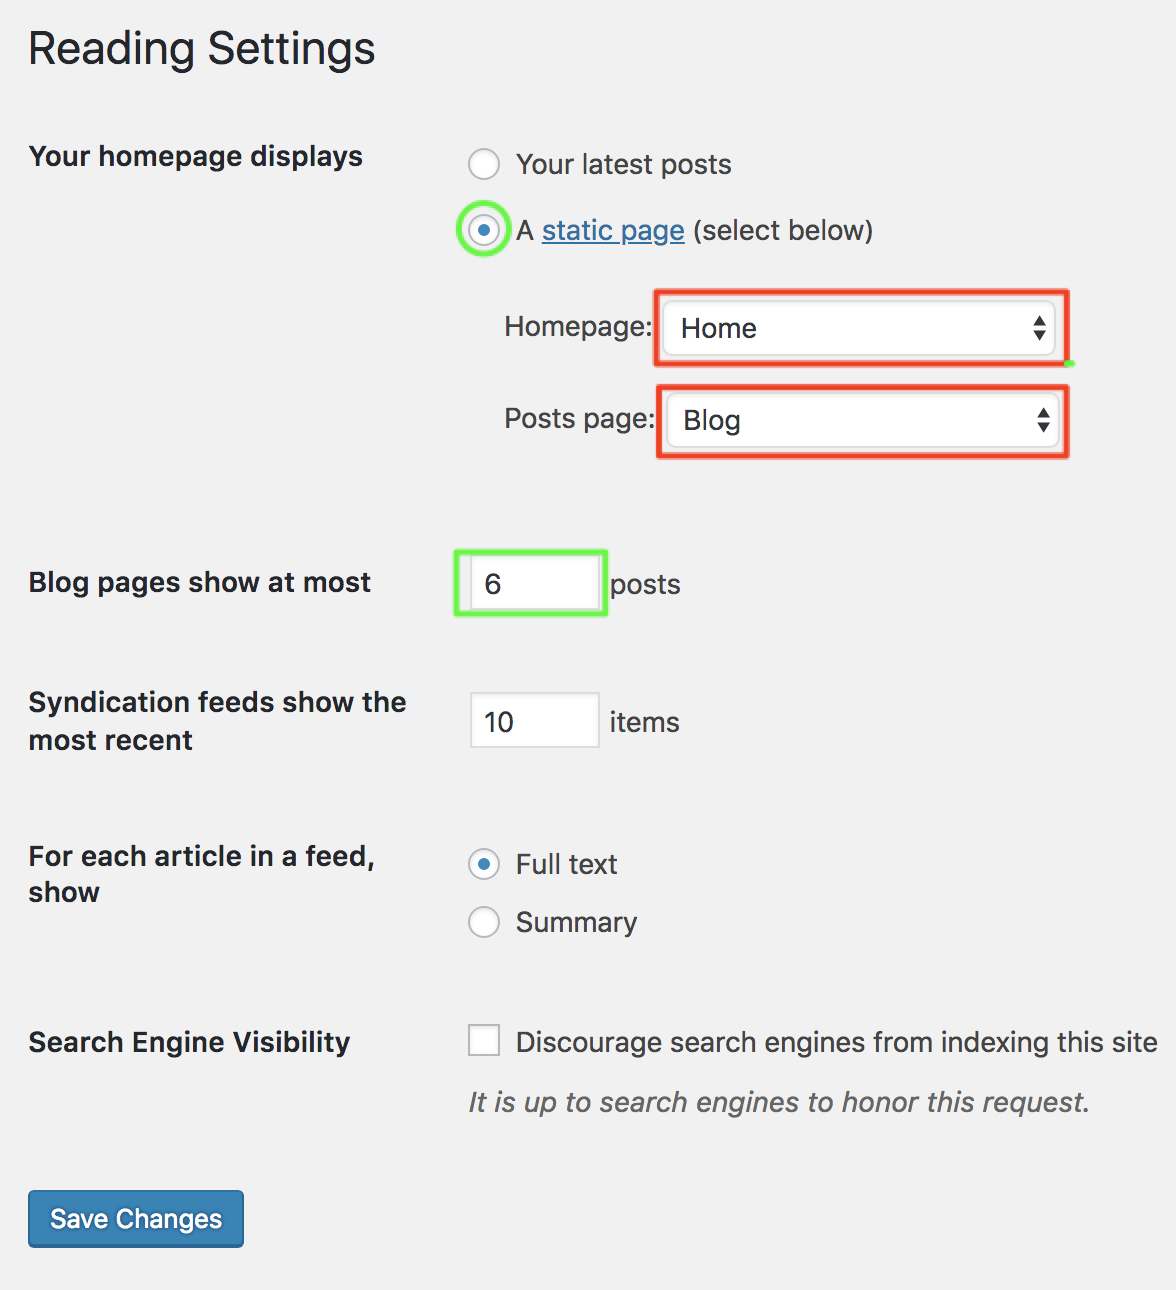
Step 2. Go to “Settings” >> Reading
Reading setting allow to set static pages for front page and post page.
The default setting is set for “Your latest posts” which display your blog post.
This is the time, we want to showcase a custom front page or homepage and so we need to use static pages to show different content on front page and post page.
Check to show A static page and select the page like this we have created above.
1. Homepage = Home
2. Post page = Blog
Select the Post per page. The default is 6 posts.
The Genesis framework includes Blog Template but the Bill mentioned: “it is not the main query, so customizations to the query won’t work”. Read why you should not use the Genesis Blog Page Template.
https://www.billerickson.net/dont-use-genesis-blog-template/
Well, I was no clue about it and I was using the above setting for all my previous themes like Sahifa, MythemeShop and more. I did not know if there is an option “Page attributes” which enables different template for different pages.
the newbie me 😀
So, How does the Reading setting works?
When we have set “Your latest posts”. The “example.com” is your front-page and homepage both.
and so, Both Tag will work.
>> Conditional Tag – is_home()
>> Conditional Tag – is_front_page()
this will work too in best manner.
>> Conditional Tag – is_front_page() && is_home()
When we have set the reading setting like this
a) Homepage >> Home (a page name) convert to Permalink //example.com
b) Post page >> Blog (a page name) //example.com/blog
Now, a) is front-page >> Home >> Conditional Tag – is_front_page()
b) is home (post page) >> Blog >> Conditional Tag – is_home()
When a custom homepage is set in reading, is_home() tag will not work until you not have added a custom Post page.
This is simple and complicated at the same time and so most of us got confused with it. Know more about the conditional tags from Codex. https://codex.wordpress.org/Conditional_Tags
Now, you can customize the Front page and can add contents in your front-page section widgets of your site from “Appearance” >> Customize > Widgets and more..
or from “Appearance” >> Widgets >> Front page widgets (if there is).
To-do List 2.
Don’t worry. This is going to be simpler.
Step 1. Visit “Genesis” >> Theme Settings.
Here you can manage all default settings for your site. You can check each section and configure as per your needs.
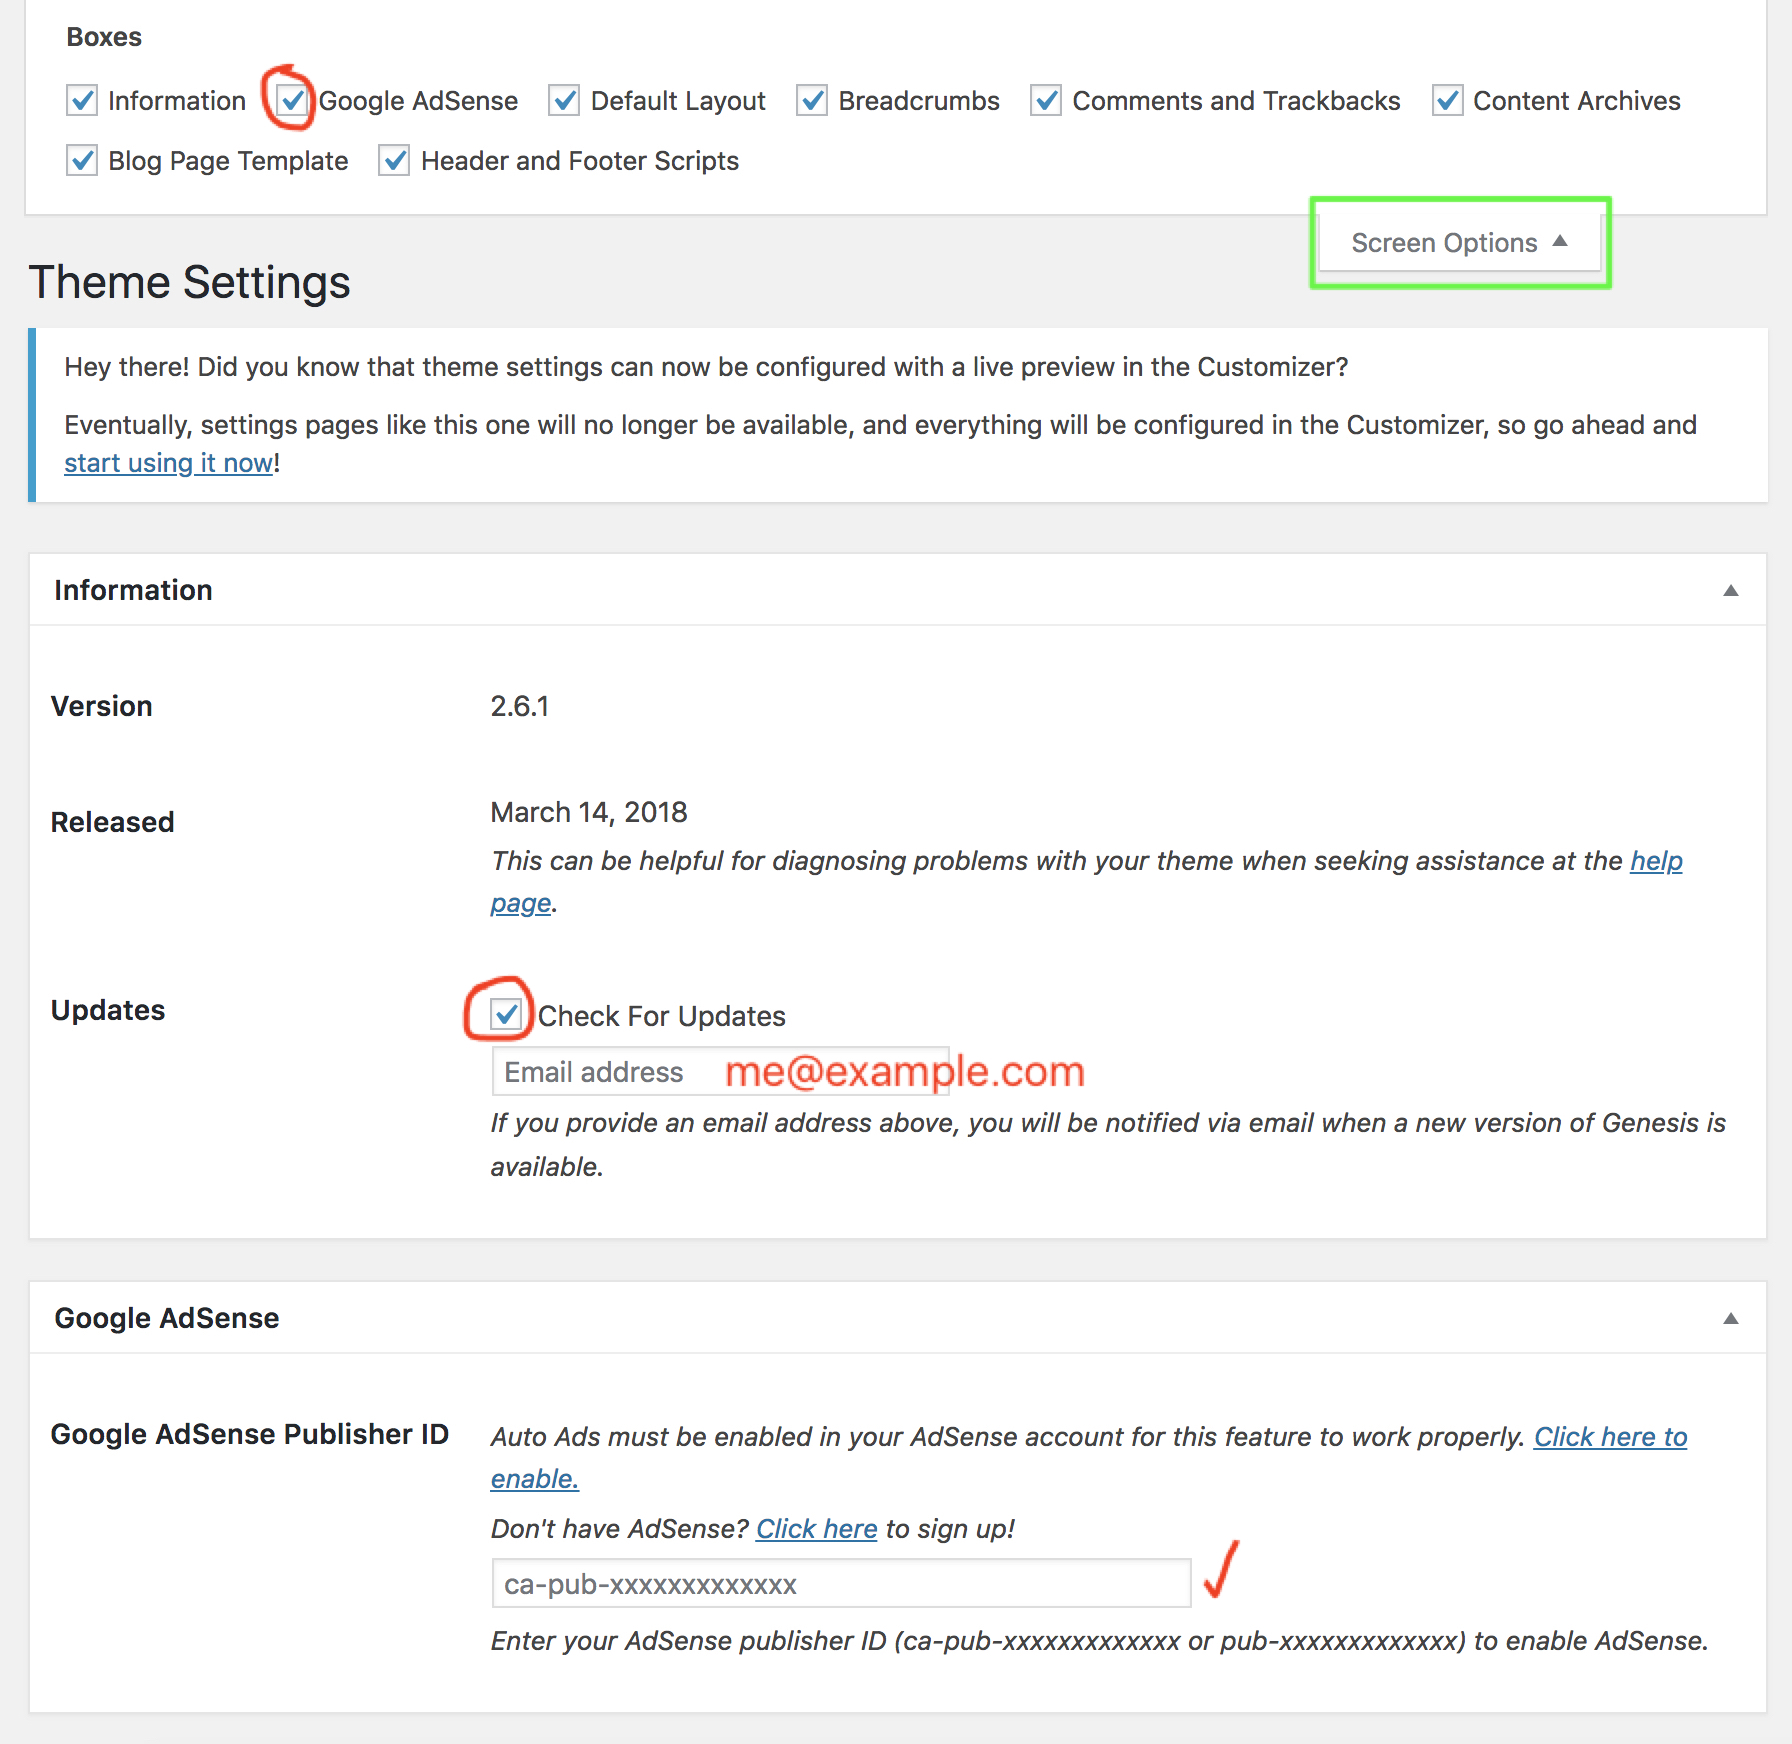 You could always hide some section by clicking right at “Screen options” or simply click on a section header to close it.
You could rearrange the sections by clicking( hold/keep it selected) on the header of a section and drag to up or down to move it.
Here, what we have on this page.
Information
The section displays the framework version and release date and allows you to notify for future updates via email.
Google AdSense
If you have an approved Google Adsense account then you can put the publisher id to show Auto-ads on your site.
Auto Ads must be enabled in your AdSense account for this feature to work properly.
Default Layout
Layouts include
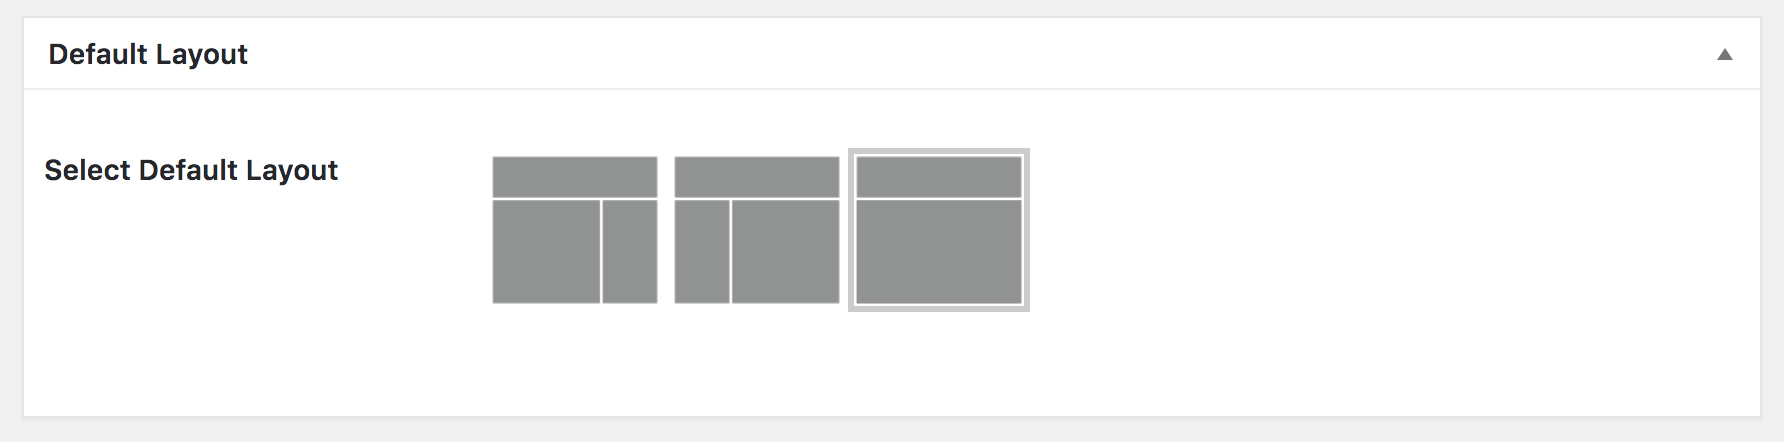
1. Conetnt+Sidebar
2. Sidebar+Content
3. Full-width Content
The preferred layout you want on for your site. Click on your favorite layout, go at the bottom and Save Changes.
You can always use additional layout using Genesis Layout Extras
Custom sidebar could be accessible by using simple sidebar plugin.
Breadcrumbs
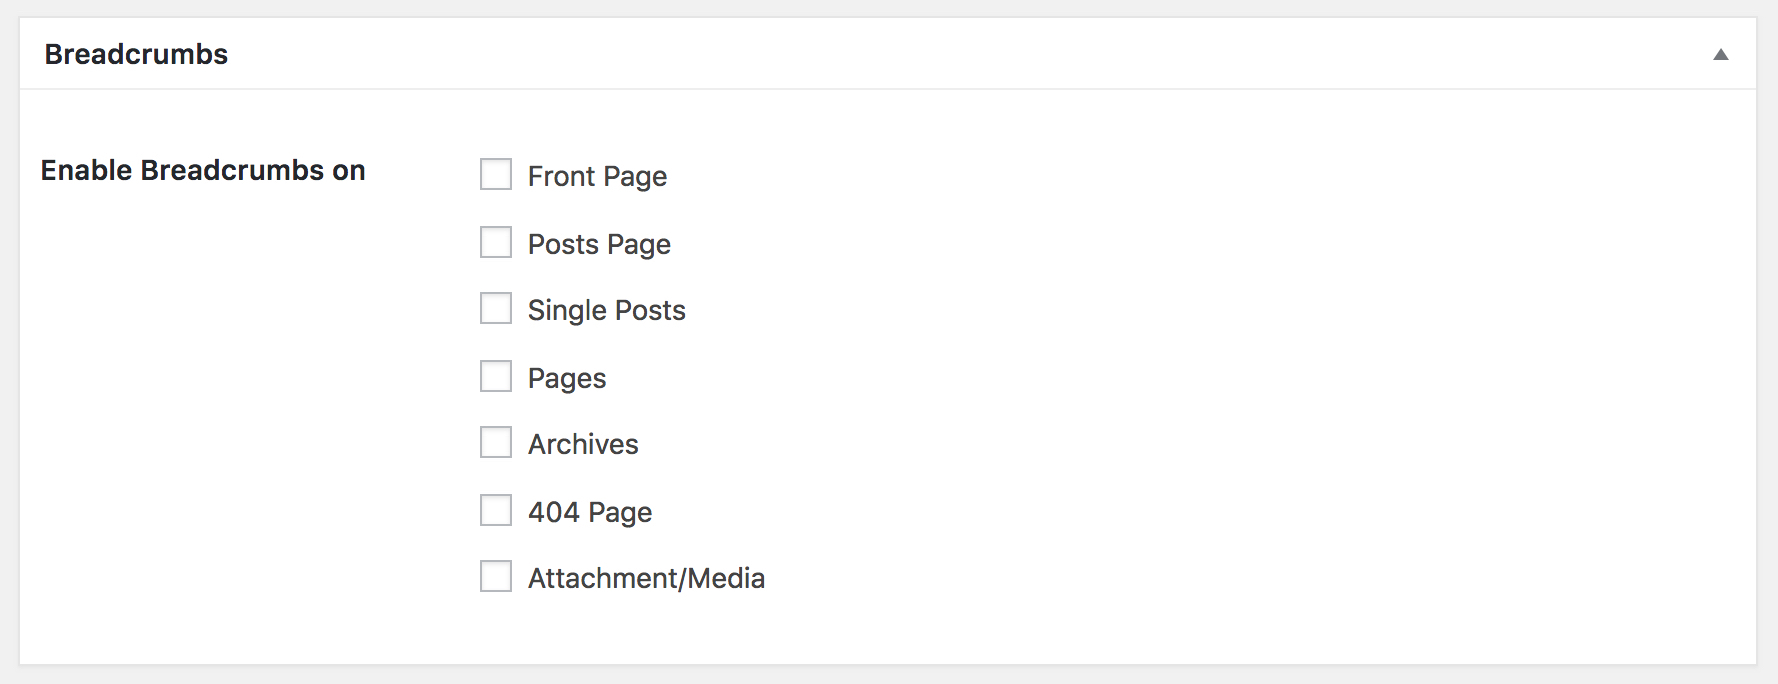 Breadcrumbs enable the Roadmap of your content. This allows a user to know where he is. It works as a navigation and shows like this in search engine.
site.com>>Shop>>clothes>>jeans>>custom jeans
default link will site.com/shop/clothes/jeans/custom-jeans
You can enable it but I recommend it for large sites like listing sites, directory sites.
Comments and Trackbacks
You can Enable Comments on Post and page both but i recommend to keep it only for posts.
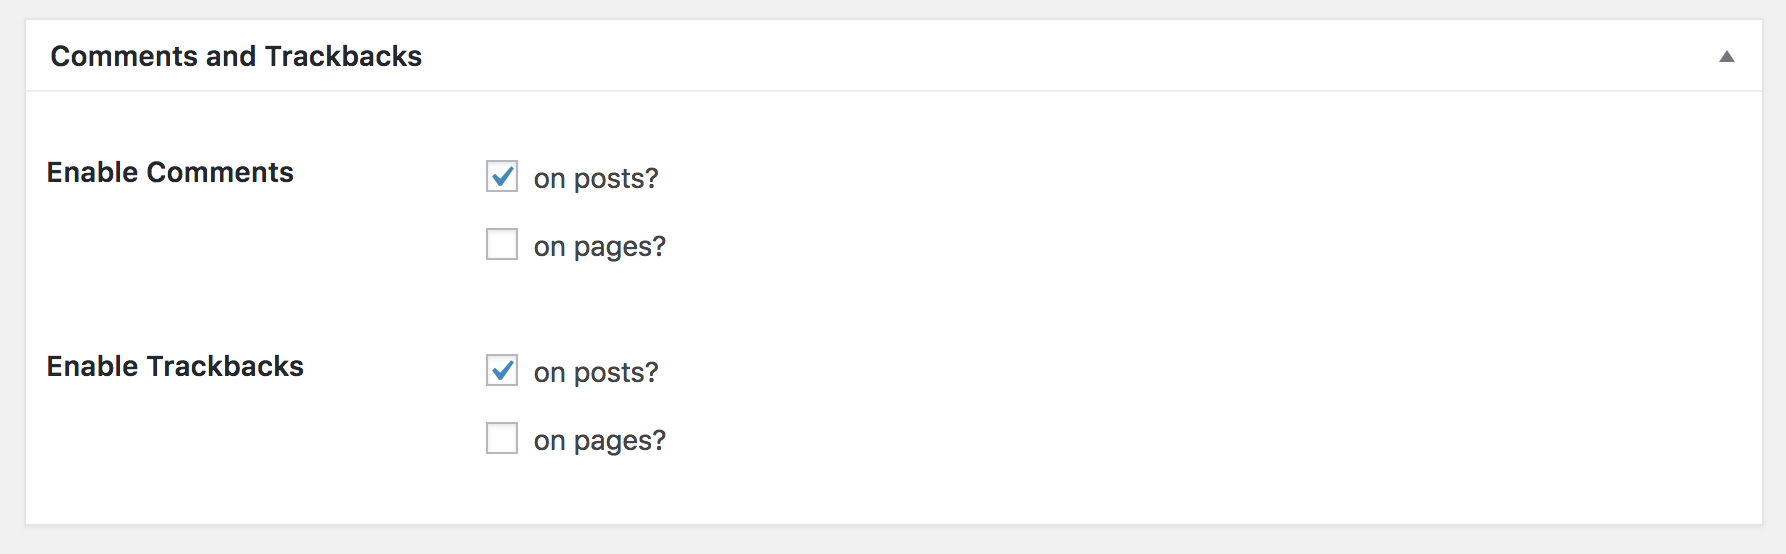 Trackbacks allow notifying legacy site that you’ve linked to them. If you link other WordPress blogs they’ll be notified automatically using pingbacks.
I don’t use it. so uncheck both the option or allow for posts only.
Content Archives
You could display Entry content or Entry excerpts and limit the content characters.
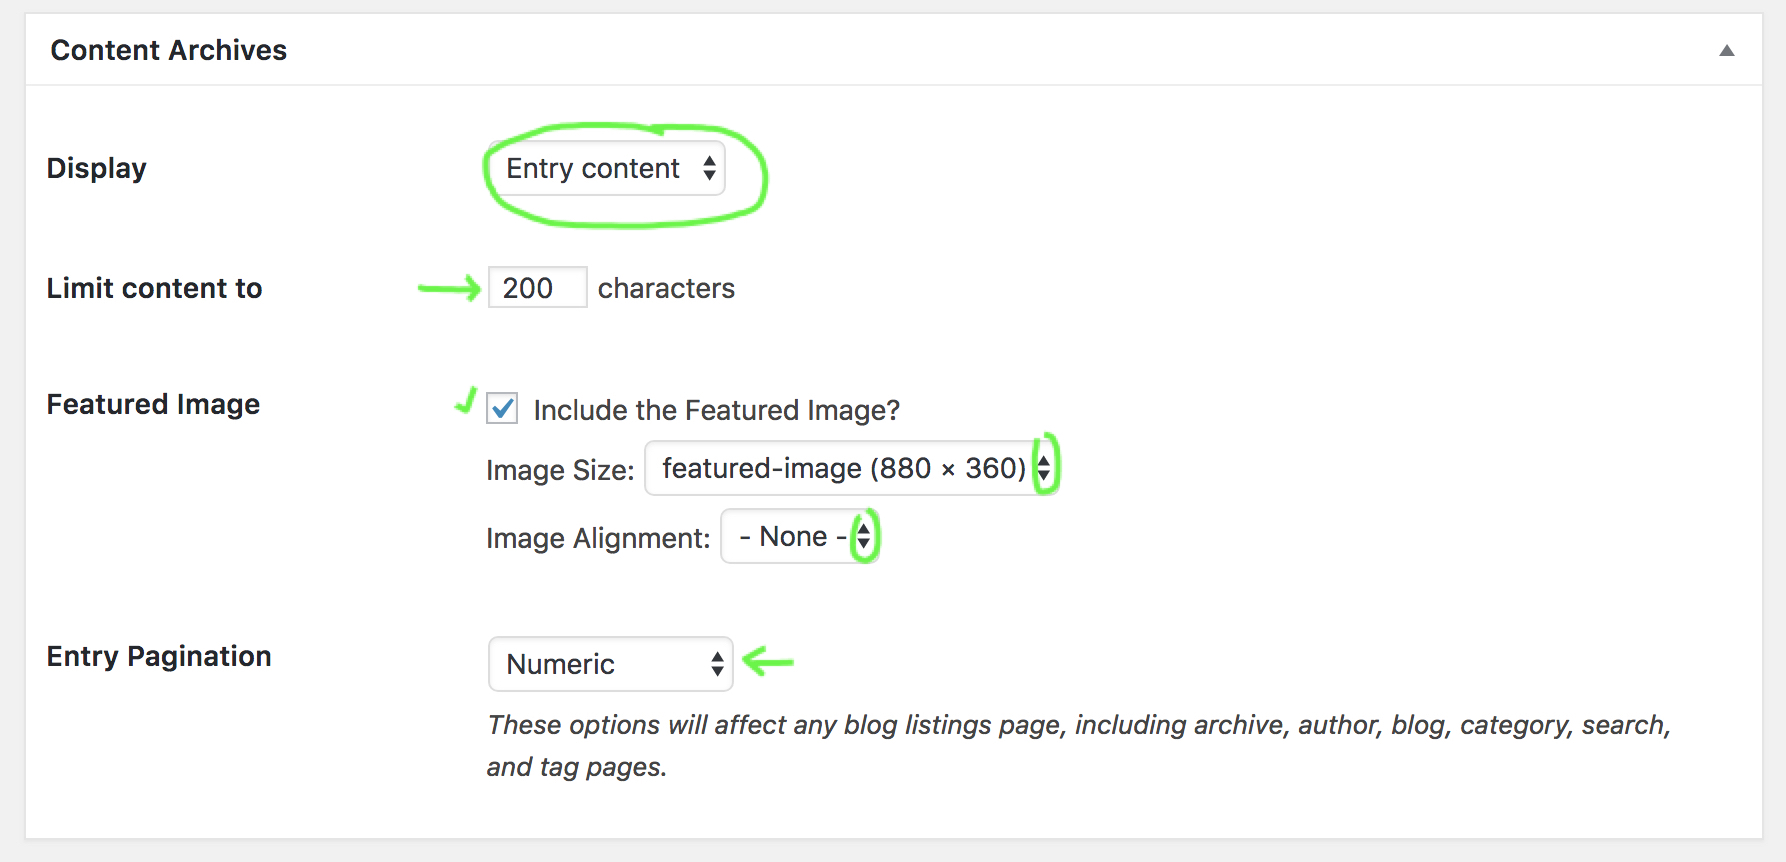 Include Feature image, select the size and image alignment. Feature image will work only when you have added it on your posts.
Plugins like Quick Featured Images, Pro
Select your default Pagination type.
Numeric = Pages:- 1,2,3,4,5
Previous/Next = << Previous Page >> Next Page
Blog Page Template
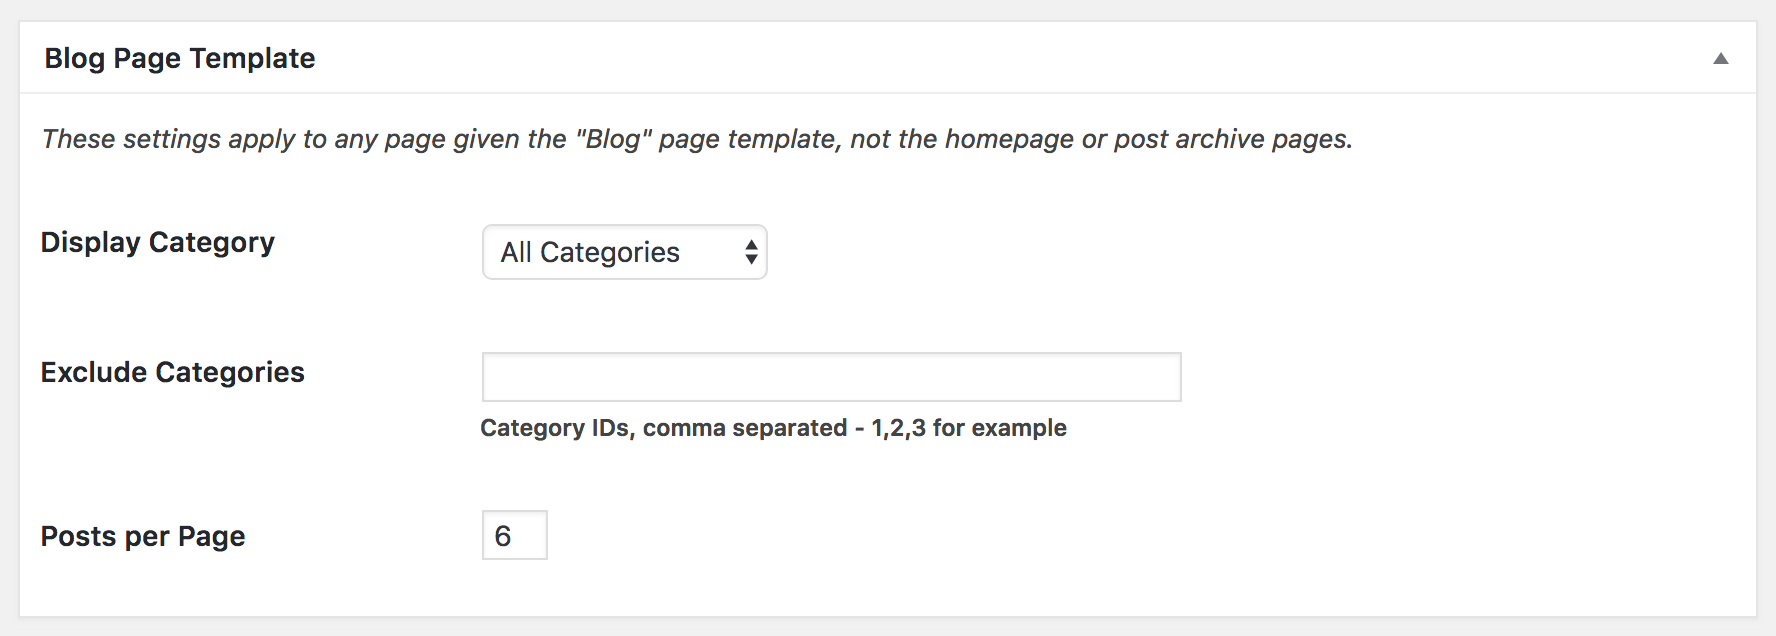 You can exclude Category or specific categories as per your needs.
I keep it default as it is.
Header and Footer Scripts
You can add html, js css anything which you want to add.
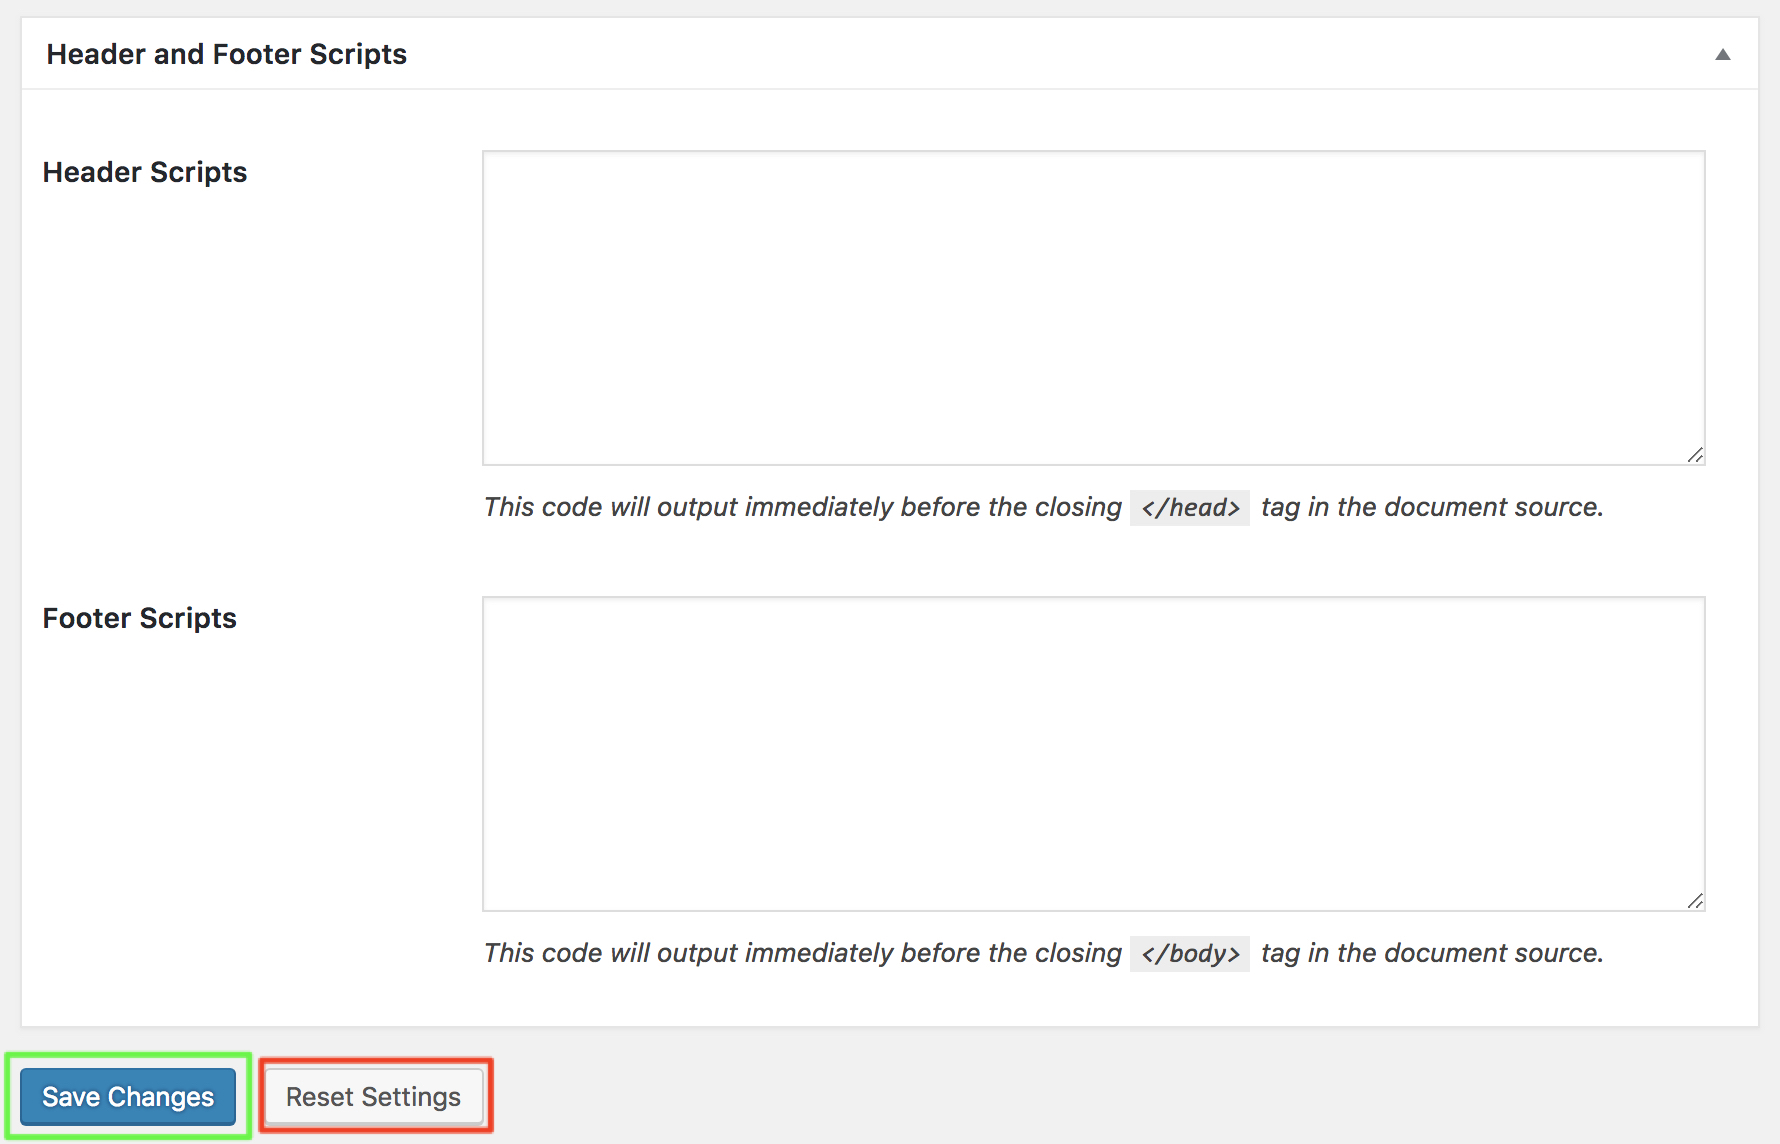
Header Scripts
Most of the time you need to add Google Analytics or Tag manager code, This is a right place to put those codes.
Footer Scripts
Add anything you want to load after everything is loaded. It could be chat box plugin or anything.
Don’t forget to click Save Changes to make it work.
Step 2. SEO settings
You can manage your global SEO setting from here and can write homepage Title and description.
I generally use an SEO plugin to get more benefits. Recommended plugins are Yoast SEO, SEOPress, and The SEO framework.
Step 3. Import/ Export
The option allows you to import and export your Genesis Settings. You can always export your setting from the old site and can import it to the new one. The data file should be .json
The Theme demo content will be imported and exported from “Tools” >> Import or Export. The file should be .xml. Extract your theme on the computer and find the .xml file and import it on your new site.
This is all for today. 🙂
Let me know if you have any issue or having problem setup up the Genesis Framework and child theme.