This tutorial provides the steps to Integrate Mailchimp with the Genesis Enews Extended plugin. Mailchimp is an affordable Mailerlite alternative Email Marketing software service.
Prerequisite:
a) Install and Activate Genesis Enews Extended plugin.
b) Appearance > Widgets. Setup the widget area where you want to show the form . You can use in the primary sidebar or can create a widget area for Newsletter section. Follow the Tutorials Tagged with Newsletter.
STEP 1
Sign Up for a New account on MailChimp.com and Create a Sign Up form by clicking on right side link “Create” and select “Sign up form”.
STEP 2
Once You will Click on the create sign up form, You will redirected to a new form like this.
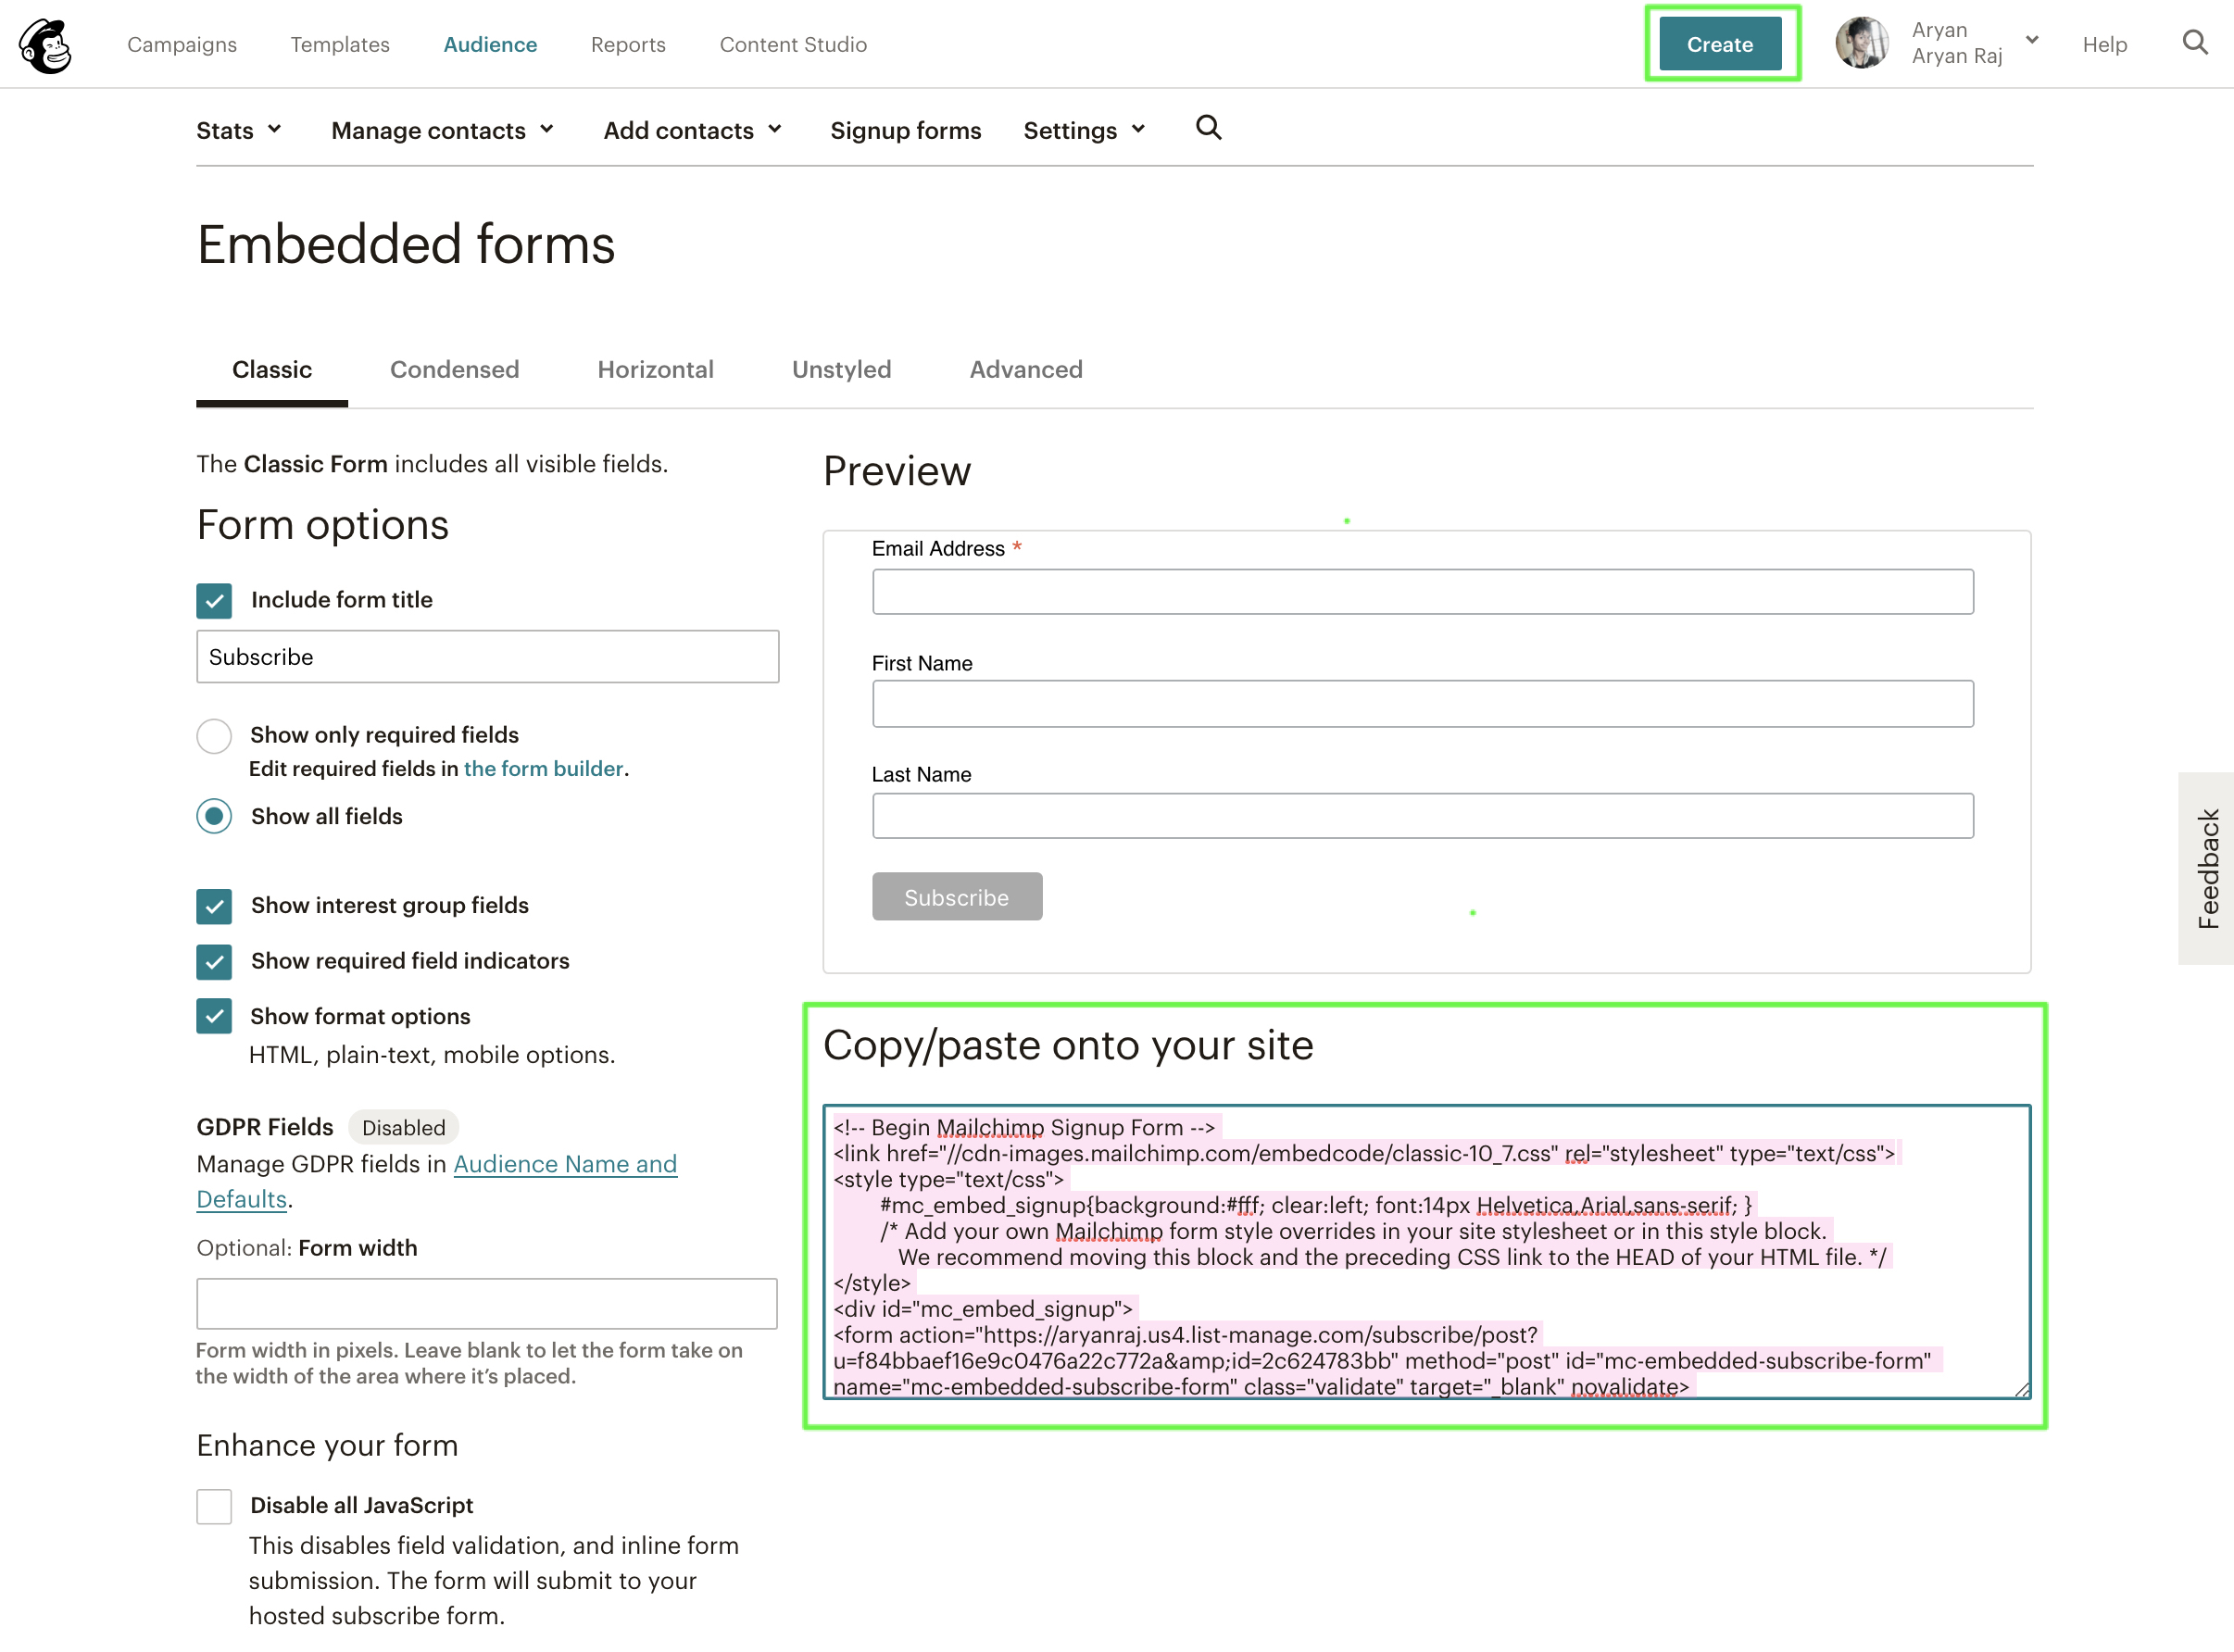
Copy the code and paste it into a text editor or notepad. Here is the sample code from one of my form.
<!-- Begin Mailchimp Signup Form -->
<link href="//cdn-images.mailchimp.com/embedcode/classic-10_7.css" rel="stylesheet" type="text/css">
<style type="text/css">
#mc_embed_signup{background:#fff; clear:left; font:14px Helvetica,Arial,sans-serif; }
/* Add your own Mailchimp form style overrides in your site stylesheet or in this style block.
We recommend moving this block and the preceding CSS link to the HEAD of your HTML file. */
</style>
<div id="mc_embed_signup">
<form action="https://aryanraj.us4.list-manage.com/subscribe/post?u=f84bbaef16e9c0476a22c772a&id=2c624783bb" method="post" id="mc-embedded-subscribe-form" name="mc-embedded-subscribe-form" class="validate" target="_blank" novalidate>
<div id="mc_embed_signup_scroll">
<h2>Subscribe</h2>
<div class="indicates-required"><span class="asterisk">*</span> indicates required</div>
<div class="mc-field-group">
<label for="mce-EMAIL">Email Address <span class="asterisk">*</span>
</label>
<input type="email" value="" name="EMAIL" class="required email" id="mce-EMAIL">
</div>
<div class="mc-field-group">
<label for="mce-FNAME">First Name </label>
<input type="text" value="" name="FNAME" class="" id="mce-FNAME">
</div>
<div class="mc-field-group">
<label for="mce-LNAME">Last Name </label>
<input type="text" value="" name="LNAME" class="" id="mce-LNAME">
</div>
<div id="mce-responses" class="clear">
<div class="response" id="mce-error-response" style="display:none"></div>
<div class="response" id="mce-success-response" style="display:none"></div>
</div> <!-- real people should not fill this in and expect good things - do not remove this or risk form bot signups-->
<div style="position: absolute; left: -5000px;" aria-hidden="true"><input type="text" name="b_f84bbaef16e9c0476a22c772a_2c624783bb" tabindex="-1" value=""></div>
<div class="clear"><input type="submit" value="Subscribe" name="subscribe" id="mc-embedded-subscribe" class="button"></div>
</div>
</form>
</div>
<script type='text/javascript' src='//s3.amazonaws.com/downloads.mailchimp.com/js/mc-validate.js'></script><script type='text/javascript'>(function($) {window.fnames = new Array(); window.ftypes = new Array();fnames[0]='EMAIL';ftypes[0]='email';fnames[1]='FNAME';ftypes[1]='text';fnames[2]='LNAME';ftypes[2]='text';}(jQuery));var $mcj = jQuery.noConflict(true);</script>
<!--End mc_embed_signup-->
STEP 4
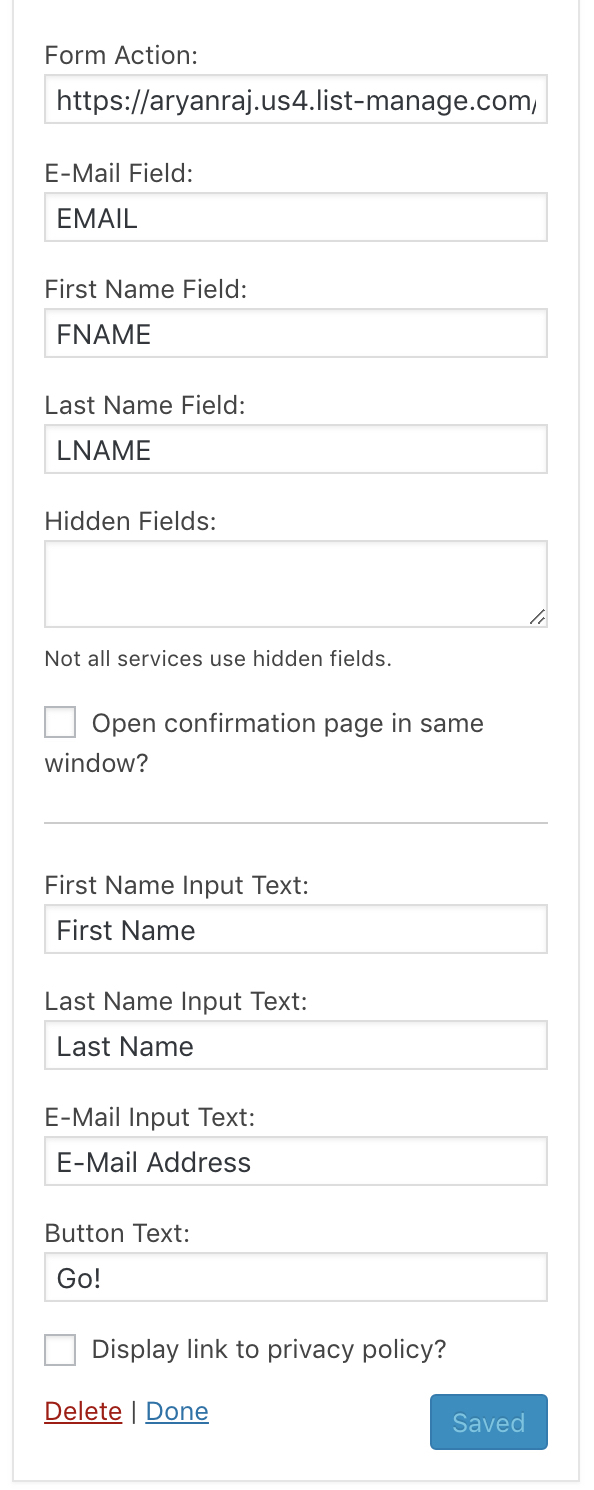
Now we will find the value. Remember to Put the name value as it is in UPPERCASE or lowercase as given.
Form Action:
<form action="https://aryanraj.us4.list-manage.com/subscribe/post?u=f84bbaef16e9c0476a22c772a&id=2c624783bb" method="post" id="mc-embedded-subscribe-form" name="mc-embedded-subscribe-form" class="validate" target="_blank" novalidate>
Value is –
https://aryanraj.us4.list-manage.com/subscribe/post?u=f84bbaef16e9c0476a22c772a&id=2c624783bb
E-mail Field:
<input type="email" value="" name="EMAIL" class="required email" id="mce-EMAIL">
Value is –
First Name Field:
<input type="text" value="" name="FNAME" class="" id="mce-FNAME">
Value is –
FNAME
Last Name Field:
<input type="text" value="" name="LNAME" class="" id="mce-LNAME">
Value is –
LNAME
Hidden Fields:
Find if any thing looks similar starting with (Don’t use it directly). No hidden field is in Mailchimp.
<input type="hidden"
Take a Look at the Screenshot

Save the Widget.
Done.